Home / All Recipes / Oven-Baked Pita Bread
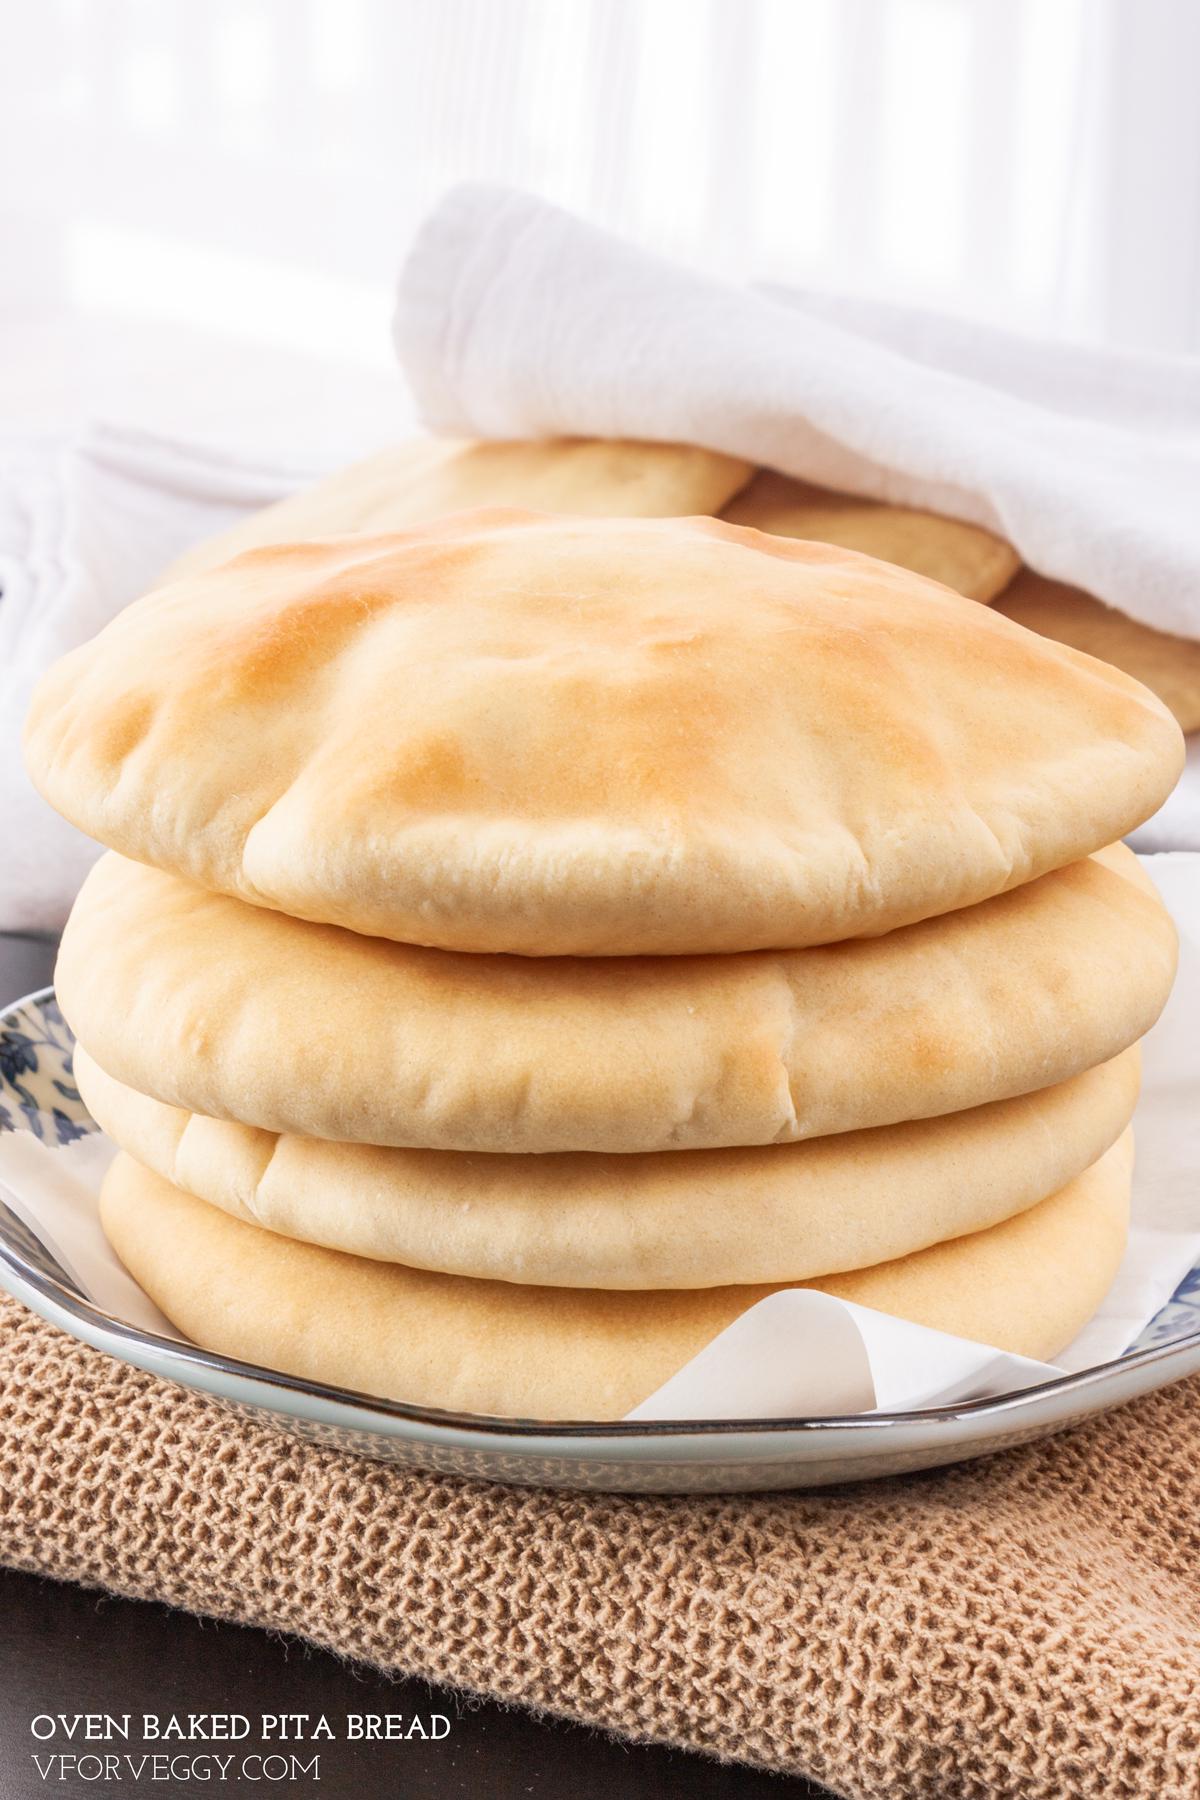
Oven-Baked Pita Bread
I love all sort of flat breads, from focaccia to naan, and of course, pita. Just a couple of years ago, I would never dream of baking my own bread, let alone something that seems as complicated as pita. As with everything in life, if you put enough effort in it, you can accomplish just about anything, including baking your own pita bread. So, with only 6 ingredients at hand, anyone can try this oven-baked pita bread recipe and never ever have to buy again.
The mighty six ingredients
Here are what you need to make your very own oven-baked pita bread, all-purpose flour, active dry yeast, baking powder, salt, sugar, and vegetable oil. You need water too, but everyone knows you don’t actually count that right? Anyway, the trick in ensuring a puffed up pita lies in a very very hot oven, and not so much in kneading the bread. And I am going to give plenty of tips in the recipe.
Oven-Baked Pita Bread
Ingredients
- 1 cup warm water (38 Celcius / 100 Fahrenheit)
- 2 teaspoon active dry yeast
- 2 teaspoon sugar
- 360-400 gram all-purpose flour
- 1/2 teaspoon baking powder
- 1 1/2 teaspoon salt
- 2 tablespoon oil
Instructions
- Mix together warm water with active dry yeast and sugar. Let it sit for 10 minutes, or until foamy.
- Meanwhile, whisk together 360 gram all-purpose flour, baking powder, and salt in a large mixing bowl.
- Once the yeast is ready, make a well to the flour mixture, and slowly stir in the yeast solution, along with oil. Keep stirring until the dough is a shaggy mass. Knead with hands for 10 minutes, or until the dough is smooth. You may need to add a bit of flour (~40 gram more) if the dough is too sticky.
- Transfer the dough to a lightly greased bowl, cover with a wet kitchen towel/saran plastic, and proof for 1 hour, or until the volume is almost double.
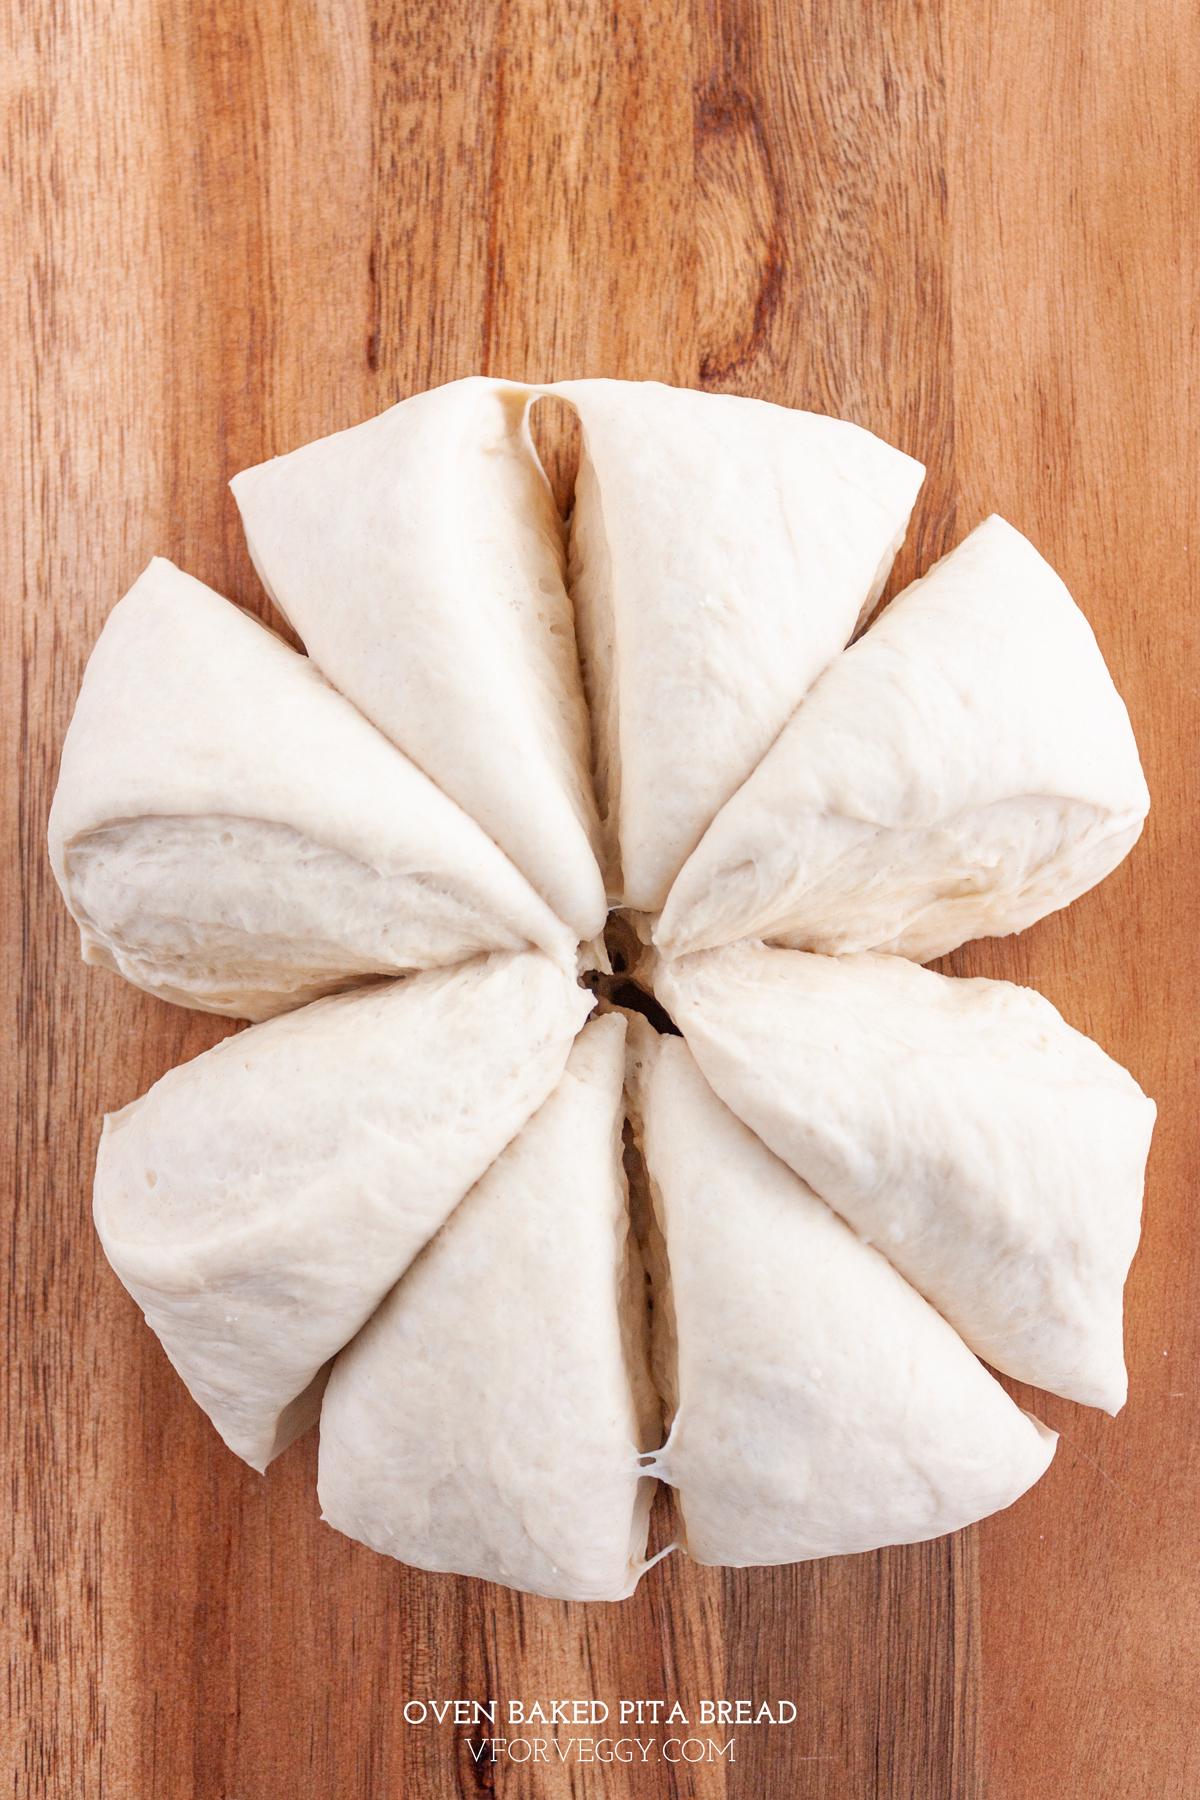
- Turn the dough out to a lightly oiled work surface, and divide into 8 equal portions.
- Now would be a good time to preheat your oven to 260 Celsius (500 Fahrenheit). Also, lightly grease your baking sheet (I use two half-sheet pans).
- If you use half-sheet pans, then each pan should fit 4 bread. Since we are going to bake one baking sheet at a time, we will want to only roll 4 pieces of dough into 6" circles and place them on the greased baking sheet. Cover the unrolled dough so they don't dry out.
- Once the oven reaches 260 Celsius (500 Fahrenheit), wait for another 5 minutes, then place the baking sheet on the lowest rack, and bake for 5 minutes. The bread should all puffed up. If not, bake for another minute. If at 6 minutes the bread still doesn't puff up, your oven is probably not hot enough and you may want to increase the temperature to 274 Celcius (525 Fahrenheit) for the next batch.
- Then transfer the baking sheet to the middle rack and bake for another 2 minutes, or until the bread turns golden brown.
- Remove the baked bread and wrap with a kitchen towel to keep them soft. Repeat the baking steps with the rest of the dough.
Comments
You had me sold at 6 ingredients. I've made bread before but not pita. It's going on my recipes to make during this pandemic. YUM!
This is perfect! My mom said she wanted to make her own Pita and here is the best recipe I've found. Yay!
Ooh I have been looking for a homemade pita recipe, and these look absolutely perfect! I love how fluffy they look, and I'm surprised how quick they are to make.
I love pita bread. I really should make it more often. It can be used in so many different ways. Thanks for the reminder.
I love pita bread for breakfast but never knew it was this easy to make! Yours looks absolutely gorgeous Anita!
Only one out of all 8 puffed. This is the 3rd recipe I’ve wasted flour trying. Yes I followed the directions to the T. I’m known for my custom cakes so it’s not like I have no experience baking. On to the grocery store from here on out.
Check the date on your yeast and baking powder. I realized my baking powder was out of date. Also check if your oven temperature is correct. Hope this helps. I’m sure they still taste good even if they don’t develop a pocket. It all depends on how you want to use them. Good luck!
Love pita bread. As there's only me, and I don't want eight pita all at once, I always keep the excess dough in the fridge, and just tear a portion off when I'm ready to cook it, which I generally do on the stove top. Have deliberately left dough in the fridge just to see how long it lasts. Still good at five days!
I have made these pittas several times now and each time they are easy and perfect! Thank you so much for sharing this recipe, it means we don’t have to buy plastic wrapped ones any more :)
Finally, success. I made the oven version using this recipe and I am totally pleased. Thank you.
I made these! The recipe is perfect. Nearly all my pitas puffed up big and round the first time making this recipe.
What an easy and fun way for a beginner like me to make bread. Each pita bread came out super poofy and delicious. I added some extra roasted garlic to the bread before cooking and wow, so tasty. Such a great recipe!
I would love to try this recipe but I have a question, can gluten free flour be used and will the pita bread still puff up??
I am sorry Dea, but I haven't tried using gluten-free flour yet.
Leave a comment